Etsy Size Guide (Photos & Images)
Updated Sep 30, 2022
13 min read
Images are a vital part of being successful on Etsy. However, there are several different image types you deal with on the platform. This article is a comprehensive Etsy size guide for your photos and images. As such it examines the different image types, their minimum sizes, and allowed file types.
This article includes:
- What images do I need on Etsy?
- Etsy Size Guide for Images & Photos
- How do I get to the Info & Appearance page on Etsy?
- What is an Etsy Profile Photo?
- What is an Etsy Shop Icon?
- What is an Etsy Shop Banner?
- What is an Etsy Order Receipt Banner?
- What is an Etsy Cover Image?
- What is an Etsy Team Logo?
- What are Etsy Product Listing Images?
What Images do I need for my Etsy shop?
Images are an easy way to improve your Etsy shop and appear more professional. There are 6 important images to add to your Etsy shop, your profile photo, team logo, shop icon, shop banner, order receipt banner, and listing images. These images have different uses, sizes, and requirements. This guide shows you what each image does and how to use them best.
What images do I need on Etsy?
There are six image categories you can change and edit on Etsy. These categories are your profile image, shop icon, shop banner, team logo, and listing images. Using these images properly can give your shop that pop to stand out from the crowd. In addition to adding shop images, you can add images to your listings. In the same manner, as making your shop stand out, listing images make your listings stand out.
Note: To edit these images, you must be logged into your Etsy account.
Etsy Size Guide for Images & Photos
Below is a quick Etsy size guide for your photos and images. This table shows each image type allowed on Etsy and their minimum sizes.
| Image Type | Minimum Size |
|---|---|
| Profile Photo | 400px by 400px |
| Shop Icon | 500px by 500px |
| Mini Banner | 1200px by 160px |
| Cover Image (Big Banner) | 1200px by 300px |
| Order Receipt Banner | 760px by 100px |
| Team Logo | 200px by 200px |
| Thumbnail | 50px by 50px |
| Item Listing | 50px by 50px |
Note: If your image is too large or small for profile photo, shop icon, and team logo Etsy does not return an error. It just refuses to upload the image.
How do I get to the Info & Appearance page on Etsy?
One of the main ways to edit your Etsy shop is through the “Info & Appearance” page on Etsy. To get to the “Info & Appearance” page, you first open shop manager, click settings, and finally click Info & Appearance.
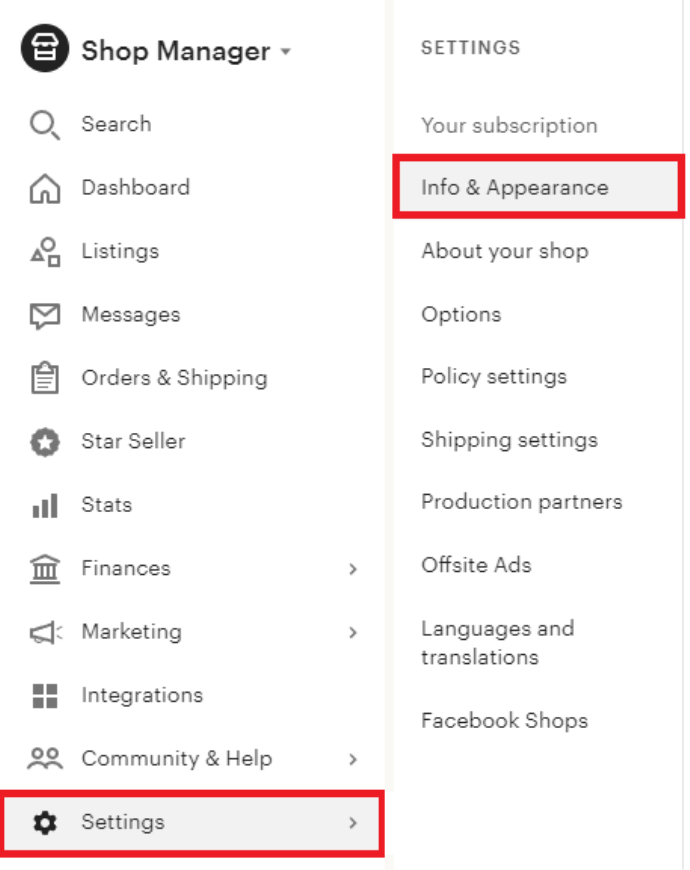
The Info and appearance page lets you change and update the following shop features:
- Shop Title
- Shop Icon
- Order Receipt Banner
- Links
- Shop Announcement
- Message to Buyers
- Message to Buyers for Digital Items
What is an Etsy Profile Photo?
Your profile photo tells customers that you are the shop’s owner. It shows them who you are and gives them a feel of your personality. You can use these images to form a connection with your customers. Customers who feel connected to an owner or shop are more likely to make a purchase. Make sure the image is clear and correctly sized. Your profile image must be square. Using the wrong image size could make it tiny or stretched and distorted.
How big can my Etsy Profile Photo be?
Size Requirements
- Minimum size - 400px by 400px
- The maximum file size is 10MB
File Types
- .jpg
- .gif
- .png
Note: Once set, you cannot delete your profile picture. You can only change from one image to another.
How do I add a Profile Photo using the Public Profile Page?
One way to add or change your Etsy profile photo is through the public profile page. To get there, click your name in the bottom left corner of the screen, then click on the “Your Profile” button.
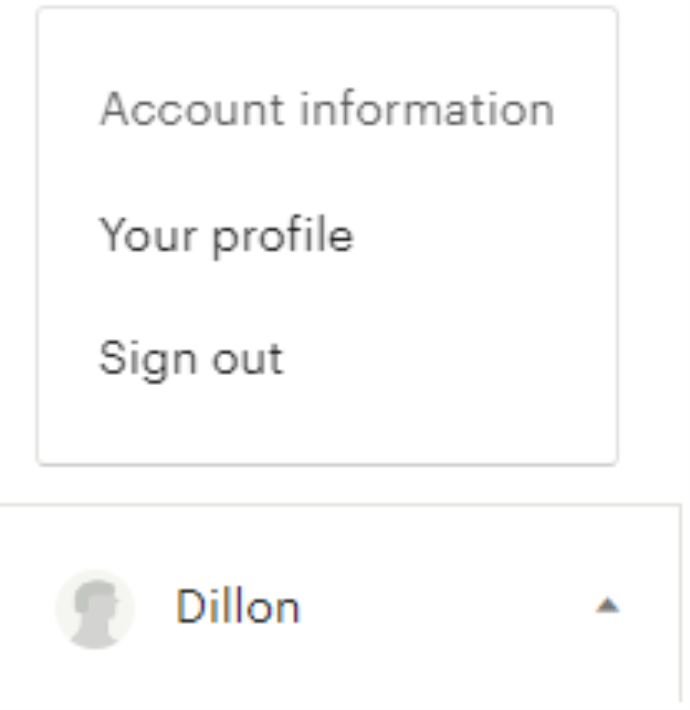
Once on your public profile page, click the “Choose File” button in the Profile Picture section.
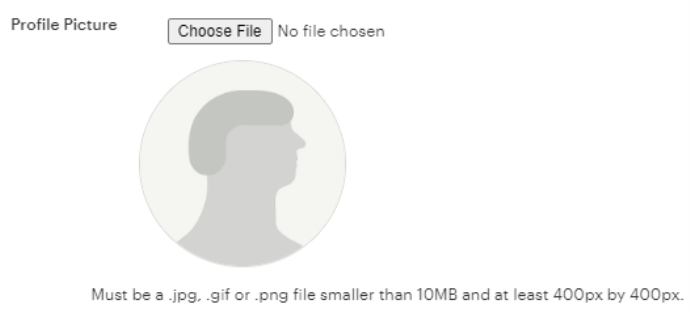
Clicking this will open your file explorer. Select your image, click open, then click the “Save Changes” button at the bottom of the page.

How do I add a Profile Photo using the Shop Page?
The other way to add or change your Etsy profile photo is through your shop. You first navigate to your shop’s page, then click the “Edit Shop” button on the top left of the screen.
Once clicked, you can change numerous aspects of your Etsy Shop. For your profile picture, you need to click the camera button next to the picture of a person.
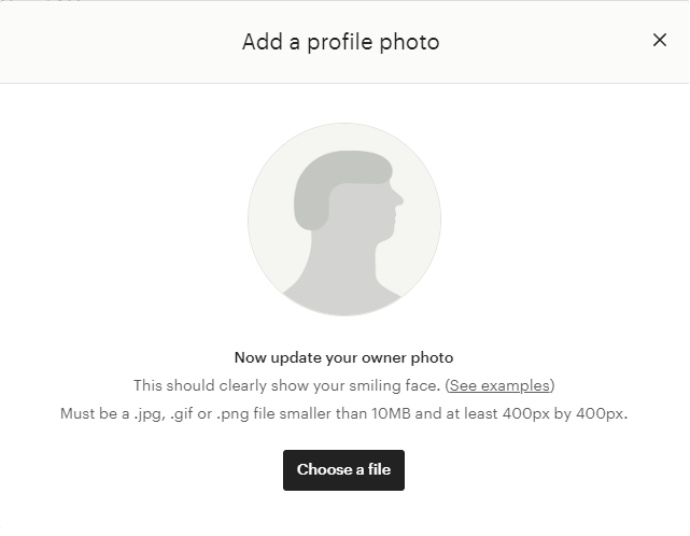
Once clicked, the “Add a profile photo” popup box will appear. In here, click “Choose a file”, this opens up file explorer. Find the image you want, select it, click open, then click save.
That’s all you need to do to add a profile logo to your Etsy shop. In the next few sections, we will add images to your Etsy shop.
What is an Etsy Shop Icon?
Your shop icon is a logo or image for your business on Etsy. You can find this image next to your shop’s name and bio. Customers use this logo to identify which shop they are browsing. We recommend you use the same shop icon if you sell on multiple platforms. Having the same icon everywhere solidifies your brand and makes it easy for customers to identify your shop. Using different icons for each website can confuse your customers. If your customers are confused, they will be less likely to buy from you.
How big can my Etsy Shop Icon be?
Size Requirements
- Minimum size - 500px by 500px
- The maximum file size is 10MB
File Types
- .jpg
- .gif
- .png
How do I add a Shop Icon using the Info & appearance Page?
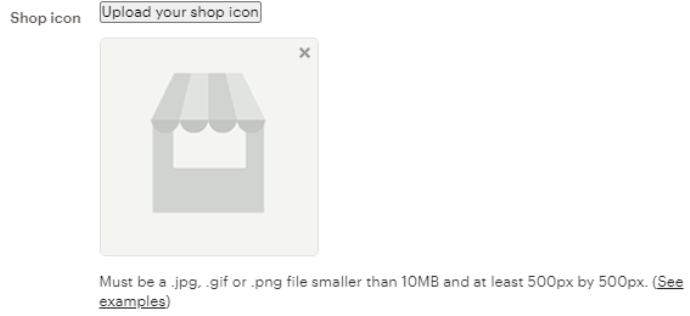
One method to add or change your Etsy shop icon is the Info & Appearance page. Once there, you will see a section labeled “Shop Icon”. You can either drag and drop your image into the box or click “Upload your Shop Icon” and select it through the file explorer.
How do I add a Shop Icon using the Shop Page?
The other way is through your shop. You first need to navigate to your shop’s page. Once there, click the “Edit Shop” button on the top left of the screen.

Next, click the camera button below the seller’s stall to add a shop icon.
Clicking this opens the “Add a shop icon” popup. Once in the popup, clicking “Choose a file” opens up file explorer. Find the image you want to upload, select it, click open, then finally click “Save”.
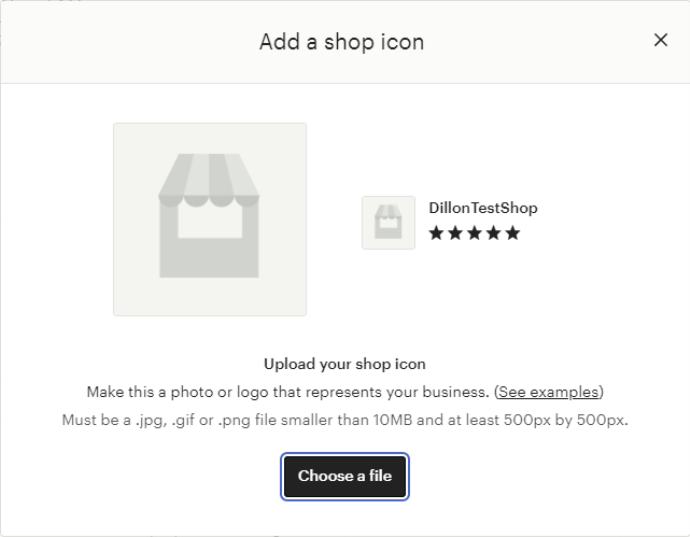
That’s all you need to do to add a shop icon to your Etsy shop. Next, we’ll add a banner to the top of your Etsy shop.
What is an Etsy Shop Banner?
The shop banner is the image that appears at the very top of your shop page. They are the largest branding asset for your Etsy shop. It is vital to have a high-quality image selected for your shop banner. You don’t want potential customers put off by seeing a low-quality or distorted image when they first enter your shop.
How big can my Etsy Shop Banner be?
There are two banner sizes you can choose for your shop banner. These are the big banner and mini banner.
You use the big banner to grab your customer’s attention when they first enter your shop. With these banners, you can show off your products or describe how your shop operates. They are great for standing out and connecting with your customers. These banners show up on both desktop and mobile devices.
If you are focused more on your shop logo and listings, the mini banner is for you. It still has branding potential, but its smaller size brings your listings closer to the top of the page. These banners only show up on desktop devices.
Size Requirements Big Banner/Cover Image
- Minimum size - 1200px by 300px
- Optimal size - 3360px by 840px
- Maximum file size - 5MB
Mini Banner
- Minimum size - 1200px by 160px
- Maximum file size - 5MB
File Types
- .jpg
- .png
- .gif
If you are an Etsy Plus member, you gain access to the carousel and collage banner options. The carousel plays through, at most, four images. These images need to be at least 1200px by 300px.
Collage, on the other hand, assembles up to four images into one static image. The size of the images differs depending on how many you select.
- 2 images - 600px by 300px
- 3 images - 400px by 300px
- 4 images - 300px by 300px
How do I add a Shop Banner using the Shop Page?
The only way to add a shop banner is through your shop page. On your shop page, click the “Edit Shop” button on the top left of the screen.

To add a banner image, you need to click the ”+” at the top of the screen.

Clicking this opens up the “Choose a banner style” popup. This popup is where you choose the type of banner you want.
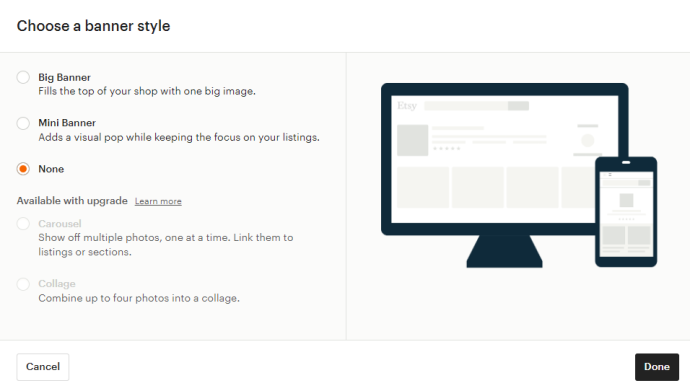
After selecting your desired settings and clicking done, an image upload box will appear. Either drag and drop an image into the box or click anywhere within the box to open up file explorer.
Once complete, your shop banner will be set and viewable by Etsy shoppers.
What is an Etsy Order Receipt Banner?
The Etsy order receipt banner is the new name for their old small banner. It is also the banner that shows up on packing slips and order receipts.
Size Requirements
- Minimum size - 760px by 100px
- Maximum file size - 2MB
File Types .jpg .png .gif
The maximum file size for banner images is 2MB.
How do I add an Order Receipt Banner using the Info & appearance Page?
The only way to add an Etsy order receipt banner is through the Info & Appearance Page. Once on the info & appearance page scroll down to the order receipt banner section.

Clicking the “Choose File” button open your file explorer. You need to find your image, select it, click open, then click save changes at the bottom of the page.
What is an Etsy Cover Image?
The Etsy cover image is just another name for the big banner.
Size Requirements
- Minimum size - 1200px by 300px
- Optimal size - 3360px by 840px
File Types .jpg .png .gif
The maximum file size for banner images is around 5MB.
What is an Etsy Team Logo?
Etsy team logos are the images in the shop members section. Your use these images to introduce your team, who they are, and what they do. These images help customers connect with your shop and team. If customers form a connection with your shop and its members, they are more likely to make a purchase.
Size Requirements These images must be at least 200px by 200px.
File Types
- .jpg
- .png
- .gif
How do I add a Team Logo using the Shop Page?
The first way to add team logos is therough the shop page. You will first need to navigate to your shop and click the “Edit Shop” button.

After you click that, scroll down to the “Shop Members” section. To add a shop member click the “Add a personal bio with some fun facts about yourself” link.

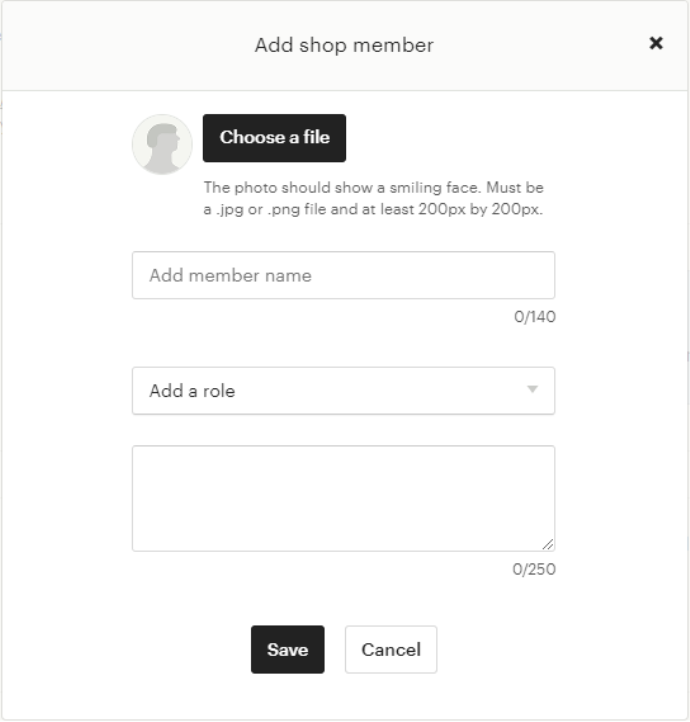
Clicking this link brings up the “Add shop member” popup. In this popup, click the “Choose a file” button to open the file explorer and add an image. You also need to fill out the member’s name, but you do not need to fill out their job role and description. After everything is the way you want it, click save.
How do I add a Team Logo using the Shop Members page?
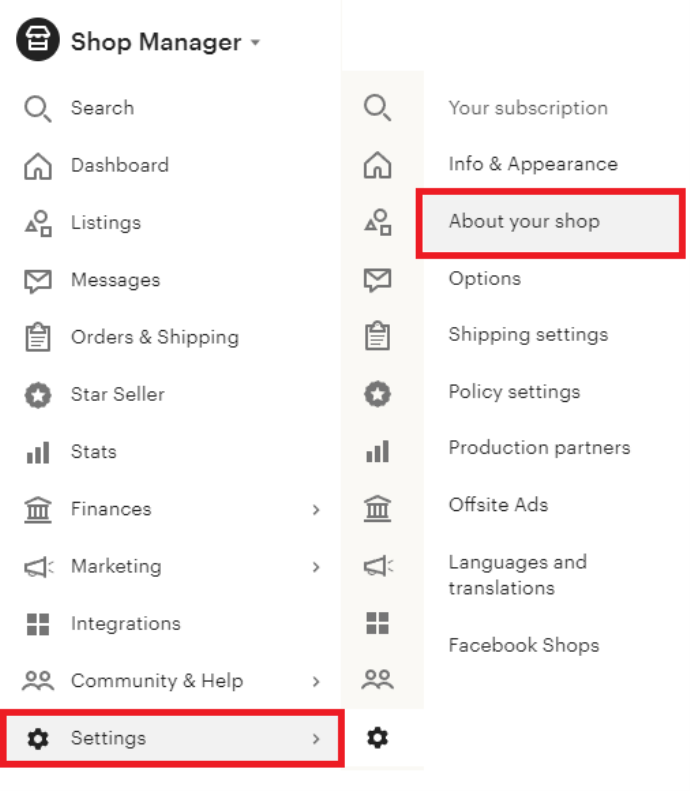
The second way to add team logos to your shop is through the shop members page. To get there, go to Shop Manager, click Settings, then click About Your Shop. Once on this page, make sure you are working in the Members tab.
If you do not have team logos set up already, you will see the following:
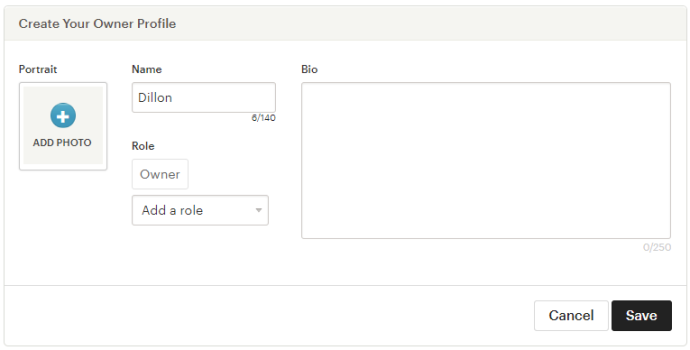
This first team logo is for the shop’s owner. To add a team logo click the “Add a photo” box. Doing this opens file explorer. In file explorer, find your desired image, select it, and click open. The only required information is the shop owner’s name. Once you are happy with the settings, click Save.
Adding team logos for new members is similar to adding the owner, but with two additions. First, you must click the Add Shop Member button to open a new Add Shop Member form. Second, is you must now select the member’s role. In these additional member forms, both name and role are required.
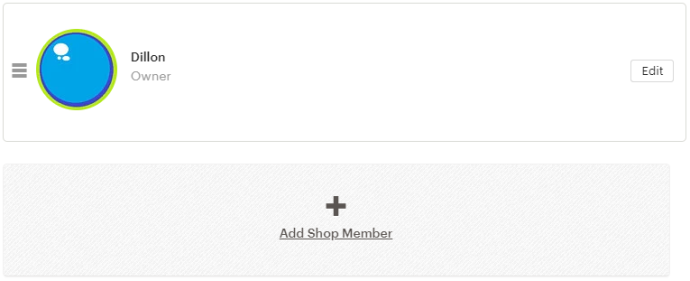
That’s all you need to do to add a new shop member with a team logo. The process is the same if you want to add a team logo to an existing shop member.
What are Etsy Product Listing Images?
Having high-quality and correctly formatted images for your listings is vital to how well your items sell. Since Etsy is completely online, customers have to make their purchasing decisions based on what your products look like in your images. If you provide low-quality or hard-to-understand images you will drive your customers off.
There are two types of product images on Etsy. These are the thumbnail image and general product images. The thumbnail image is what customers see when browsing around on Etsy and your Shop. The general product images are whet they see when looking at the listing itself.
Size Requirements
- Thumbnails should be at least 570px by 456px.
- Product images should be at least 800px by 1,000px.
- These images can be, at most, 10B in size.
File Types
- .jpg
- .png
- .gif
What is an Etsy Listing Image?
Etsy listing images are the images you see when looking at products on Etsy. Listing images need to be high quality and formatted correctly. Since Etsy is online, customers make purchasing decisions based on product images. If you provide low-quality or distorted images, customers will believe you are also selling low-quality or distorted products.
There are two types of product images on Etsy. The first image type is the thumbnail. The thumbnail image is what customers see when browsing around on Etsy and your Shop. The second is the general product images. These images are what customers see when looking at the listing itself.
Size Requirements Thumbnails should be at least 570px by 456px. Product images should be at least 800px by 1,000px. These images can be, at most, 10B in size.
File Types
- .jpg
- .png
- .gif
How many Etsy product listing images can I have?
Etsy allows you to have ten images per listing. When taking these images, Etsy recommends you do the following:
- Use natural light and no flash.
- Include a common object for scale.
- Show the item being held, worn, or used.
- Shoot against a clean, simple background.
- Add images to your variations so buyers can see all their options
In addition to these recommendations, Etsy provides image ideas for the types of images you can add to your listings. You can put whatever image you like in each box, these are just some examples to help you along.
How do I add an image to an Etsy product listing?
Adding images to an Etsy listing is straightforward. You need to first navigate to the Shop Manager page. From there, you navigate to the listings page. On the listings page, find the listing you want to add images to and open it. Once opened, you will see the “Photos” section with the following layout.

To add an image, you either drag and drop your images into the boxes or click the “Add a Photo” button. Clicking the button will bring up file explorer. While in the file explorer, find your images, select them, then click open.
Note: You can upload more than one image at a time through the file explorer. When Selecting your images, hold shift or control, then click open with all of them selected.